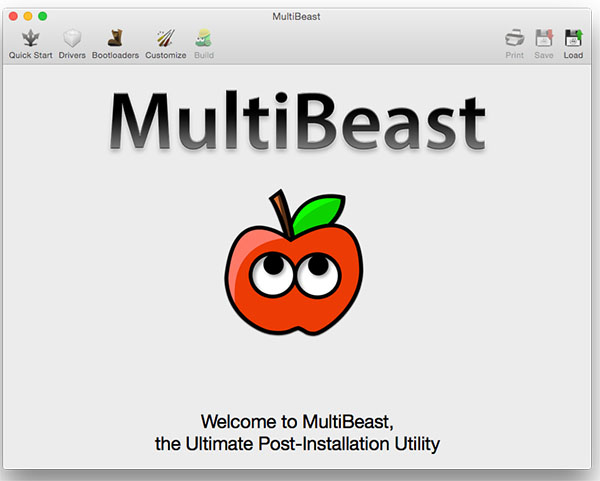
MultiBeast for Mac
11.3.0MultiBeast, the ultimate post-installation utility, has been updated to version 11.3.0 for macOS Mojave 10.14.5+. Free and streamlined utility designed from the ground up to make it as easy to choose the boot device on a hackintosh and install audio, graphics and network kernel extensions
MultiBeast Overview
MultiBeast is an all-in-one post-installation utility designed to enable boot from a hard drive. It also features a collection of drivers and customization options.Although Apple's macOS operating system has been designed to make it hard to use on other computers besides the ones sold by the Cupertino based company, there are tools that one can use to install macOS on computers with compatible hardware.
Allows you to rapidly install a bootloader for your hackintosh
One such tool is MultiBeast, a free and streamlined application that makes it both easy and fast to make sure that an macOS installation runs properly on a machine you built on your own, with the only condition that the hardware components match the ones Apple uses to build its Macs or can run using the drivers created by Apple for its own hardware platform.
The most important feature of Multibeast is the fact that it can make any hard drive bootable with the help of a custom built bootloader, a small program designed to allow the computer to load all other operating system programs stored on its storage devices.
Install drivers for all hardware components with just a couple of mouse clicks
Multibeast can help you install the drivers needed by your computer to run macOS or the kernel extensions as they are called on the macOS platform.
Particularly, you can install the drivers for your audio, graphics, network, or storage one by one, choosing the ones compatible with your hardware configuration for each category of devices, via the left side panel, on the Drivers tab.
Furthermore, with the help of the Bootloaders tab, one can choose the bootloader to install on the macOS installation hard drive in order to make it bootable.
Customize your hackintosh’s Mac model and boot options
The next step towards a working hackintosh machine is the Customize tab, where you can tweak the boot options and choose a theme to go with the bootloader you've picked during the previous step. Moreover, this tab will also enable you to select the Mac model you want for your computer.
Taking all said in consideration, if you want a streamlined tool for getting your newly built hackintosh up and running, MultiBeast should be at the top of your list.
Install macOS Mojave
Get our latest UniBeast and MultiBeast tools from the tonymacx86 downloads section.Purchase a 16GB or larger USB drive. Do a full backup of your system. We strongly recommend performing a full backup of your existing system using Carbon Copy Cloner. By doing this, you can always go back to your working installation.
UniBeast is a tool that creates a bootable installer out of your downloaded version of macOS. In order to start fresh, you'll need access to a functional computer running OS X Lion 10.7.5 or later. This is a requirement, as you need access to the Mac App Store to download macOS and create the installation drive. To start from scratch, booting the 10.6 Snow Leopard Retail DVD directly, check out iBoot + MultiBeast.
Existing Clover users may do a direct update to macOS Mojave by simply running the Install macOS Mojave app as normal Mac users would. Follow these steps: Update Directly to macOS Mojave.
STEP 1: Download macOS Mojave
The full operating system is a free download for anyone who has purchased Mac OS X Snow Leopard, Lion, or Mountain Lion or has a Mac preloaded with OS X Mavericks, Yosemite, El Capitan, macOS Sierra, or macOS High Sierra.
Download the Application from the Mac App Store using your Apple ID on any of these specific Macs:.
MacBook (Early 2015 or newer)
MacBook Air (Mid 2012 or newer)
MacBook Pro (Mid 2012 or newer)
Mac mini (Late 2012 or newer)
iMac (Late 2012 or newer)
iMac Pro (2017)
Mac Pro (Late 2013, plus mid-2010 and mid-2012 models with recommended Metal-capable GPU)
Open Mac App Store
Log in with your Apple ID
Download macOS Mojave
The Application Install macOS Mojave will appear in /Applications.
STEP 2: Create a Bootable USB Drive with UniBeast
Take a deep breath and take your time- this is pretty simple, but it's easy to miss things if you rush. Follow each step to the letter.
Insert the USB drive
Open /Applications/Utilities/Disk Utility
Highlight the USB drive in left column (Note: in the Mojave version of Disk Utility, you must first select View / Show All Devices before you can see the USB drive there)
Click Erase button
For Name: type USB (You can rename it later)
For Format: choose Mac OS Extended (Journaled)
7. Click Erase then Done
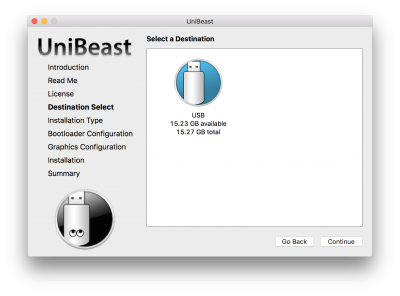
Download and run UniBeast
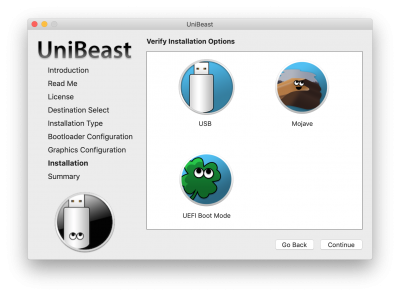
Click Continue, Continue, Continue, Continue, At Destination Select, choose USB and click Continue
At Select OS Installation screen choose Mojave and click Continue
At Bootloader Options screen choose UEFI Boot Mode or Legacy Boot Mode. UEFI Boot Mode is recommended for 7/8/9/100/200/300 Series CustoMac desktops and all UEFI capable systems. Legacy Boot Mode is recommended for 5/6 Series CustoMac desktops and all BIOS based systems.
(Optional) At Graphics Configuration screen choose the appropriate graphics option for your system and click Continue.
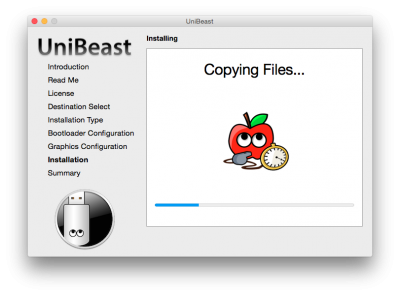
Verify installation options, then click Continue, enter password and click Install
15. Drag MultiBeast to your completed USB drive.
UniBeast delivers basic bootloader support based on our testing on recommended CustoMac systems. For further bootloader customization, download and run the official Clover package. Advanced users may also compile Clover by downloading the full source.
STEP 3: Recommended BIOS Settings
If you're installing on a recommended CustoMac desktop with AMI UEFI BIOS, the options are simple. For other systems make sure to set your BIOS to Optimized Defaults, and your hard drive to AHCI mode. Here are standard AMI UEFI BIOS settings for Gigabyte AMI UEFI BIOS, Gigabyte AWARD BIOS, ASUS AMI UEFI BIOS, and MSI AMI UEFI BIOS.
To access BIOS/UEFI Setup, press and hold Delete on a USB Keyboard while the system is booting up
Load Optimized Defaults
If your CPU supports VT-d, disable it
If your system has CFG-Lock, disable it
If your system has Secure Boot Mode, disable it
Set OS Type to Other OS
If your system has IO Serial Port, disable it
Set XHCI Handoff to Enabled
If you have a 6 series or x58 system with AWARD BIOS, disable USB 3.0
Save and exit.
STEP 4: Install macOS Mojave
You're almost done! All you need to do is boot from the USB drive and install! For best results, insert the USB in a USB 2.0 port.
Turn on the computer
Press the hotkey to choose boot device (F12 for Gigabyte motherboards, F8 for ASUS motherboards, F11 for ASrock motherboards)
Choose USB
At Clover boot screen, choose Boot OS X Install from Install macOS Mojave
When you arrive at the Installer, choose language.
If you have issues reaching the installer, you can use spacebar on boot screen to enter alternate boot modes such as verbose and safe mode. For more instructions on entering boot flags see Clover Basics and Switching Advice.
6. For a new installation of macOS, you MUST erase and format the destination drive according to the following steps before continuing.
a. In the top menu bar choose Utilities, and open Disk Utility
b. Highlight your target drive for the Mojave installation in left column.
c. Click Erase button
d. For Name: type Mojave (You can rename it later)
e. For Format: choose Mac OS Extended (Journaled)
f. Click Erase
g. Close Disk Utility
When the installer asks you where to install, choose Mojave
Upon completion, the system will automatically restart.
Press the hotkey to choose boot device (F12 for Gigabyte motherboards, F8 for ASUS motherboards, F11 for ASrock motherboards)
Choose USB
At the Boot Screen, choose Mojave
Complete macOS installation. The system will automatically reboot.
STEP 5: Post Installation with MultiBeast
MultiBeast is an all-in-one post-installation tool designed to enable boot from hard drive, and install support for Audio, Network, and Graphics. The installation is complete, but the drive isn't bootable yet. Boot from the USB again, this time choosing Mojave.
Press the hotkey to choose boot device (F12 for Gigabyte motherboards, F8 for ASUS motherboards, F11 for ASrock motherboards)
Choose USB
At the Boot Screen, choose your new Mojave installation.
Complete macOS setup
Open and run MultiBeast
6. If this is a fresh installation, click Quick Start. UEFI Boot Mode is recommended for 7/8/9/100/200/300 Series CustoMac desktops and all UEFI capable systems. Legacy Boot Mode is recommended for 5/6 Series CustoMac desktops and all BIOS based systems.
Choose the appropriate Drivers options for your system.
Click Customize for further options
Click Print or Save to back up your configuration
Click Build then Install
If using a GeForce GTX 1050, 1050 Ti, 1060, 1070, 1070 Ti, 1080, 1080 Ti, TITAN Pascal, and TITAN Xp 'Pascal' graphics card or NVIDIA GeForce GTX 750, 750 Ti, 950, 960, 970, 980, 980 Ti, and TITAN X 'Maxwell' graphics card, macOS Mojave graphics drivers are not natively supported. Alternate NVIDIA drivers are required.
Alternate NVIDIA Graphics Drivers are not available yet- if you have a Maxwell or Pascal based NVIDIA card, stay on High Sierra for now.
(Optional) Download and install Alternate NVIDIA Graphics Drivers
Reboot
You now have a fully updated bootable version of macOS Mojave on your CustoMac! And a super handy USB rescue drive. It's easy to get frustrated, but don't give up! If you get stuck, there are many users with similar hardware in the tonymacx86 Forum to provide support.
Troubleshooting
Update Directly to macOS Mojave1. Update your existing Clover install to version r4515 or higher using MultiBeast or official Clover package.
2. Open Clover configuration folder on the root of your system drive or EFI Partition using EFI Mounter v3. Copy FakeSMC.kext and any other extra necessary kexts to /EFI/CLOVER/kexts/Other/. If you need essential kexts, download them here.
3. Download Install macOS Mojave Application from the Mac App Store. When complete, the app will open. Please note, the Application will disappear after use.
4. Choose system drive for install (Example: Macintosh HD). When complete, the computer will automatically reboot.
5. At Clover boot screen, choose Boot macOS Install option (Example: Boot macOS Install from Macintosh HD). Choosing your system drive will go back to your previous installation without updating.
6. Complete the installation process- the computer will automatically reboot a few times.
7. At Clover boot screen, choose Boot macOS option (Example: Boot macOS from Macintosh HD). The computer will then complete the update.
Computer not supported error during install
This is caused by the system definition not being MacPro3,1/4,1/5,1.
Fix: Edit the "Distribution" file within the package using the Flat Package Editor.
Download the Flat Package Editor (FPE) from Apple: https://developer.apple.com/downloads/index.action
Login and search for "Auxiliary Tools"
Download the "Late July 2012" dmg
Mount the dmg and right click Package Maker to show the package contents
Browse to /Contents/Resources and copy the FPE to your Applications or Utilities folder
Open the NVIDIA Web Driver package using the Flat Package Editor
Drag the Distribution file to your desktop
Open the Distribution file using TextEdit
Scroll down to the line: var system_models = ["MacPro3,1", "MacPro4,1", "MacPro5,1"];
Add your system ID.
Make sure that you don't use smart quotes which look like italicized quotation marks.
Save the Distribution file
Go back to FPE and delete the Distribution file from that window
Drag the edited Distribution file to the FPE window and save the package, command+S
Run the package and you shouldn't get the error.
Alternate NVIDIA Graphics Drivers NVIDIA releases alternate graphics drivers separately on the web for each build of macOS. These are different from the drivers Apple ships as standard, and should be considered experimental. In the past, the drivers have been known to solve OpenCL issues with certain applications, as well as providing better native GPU power management for certain devices. These drivers are currently the only method to get full acceleration for GeForce GTX 1050, 1050 Ti, 1060, 1070, 1070 Ti, 1080, 1080 Ti, TITAN Pascal, and TITAN Xp 'Pascal' graphics cards and NVIDIA GeForce GTX 750, 750 Ti, 950, 960, 970, 980, 980 Ti, and TITAN X 'Maxwell' graphics cards. There are no current Macs with these cards, so support is absent natively in macOS.
MultiBeast Changelog
Visible Changes 11.3.0:
- Fixed description for Customize -> System Definitions -> iMac -> iMac 19,1
Internal Changes:
- Updated Clover to v2.4k r4934
- Updated Drivers -> Audio -> AppleALC to Lilu v1.3.6 and AppleALC v1.3.8
- Updated Drivers -> USB -> Remove XHCI USB Port Limit for macOS 10.14.5
- Updated Customize -> Graphics Configuration -> Core Graphics Fixup AKA WhateverGreen to Lilu v1.3.6 and WhateverGreen v1.2.9
Note for AppleALC:
Requires the installation of 100 / 200 / 300 Series Audio Support on any of these motherboard series.
Known UI Issue:
Expanding an outline choice for the first time takes two clicks. Subsequent choice expansions work as expected.
Internal Changes 11.2.1:
- Updated Clover to v2.4k r4920
Note for iMac19 SMBIOS:
Currently requires special iMac build of macOS 10.14.4. Full support should be available in macOS 10.14.5.
Note for AppleALC:
Requires the installation of 100 / 200 / 300 Series Audio Support on any of these motherboard series.
Visible Changes 11.2.0:
- Added Customize -> System Definitions -> iMac -> iMac 19,1
- Added Customize -> System Definitions -> iMac -> iMac 19,2
Internal Changes:
- Updated Clover to v2.4k r4919
- Fixed Clover UEFI Boot Mode + Emulated NVRAM to install OsxAptioFix3Drv-64.efi and ApfsDriverLoader-64.efi
Note for iMac19 SMBIOS:
Currently requires special iMac build of macOS 10.14.4. Full support should be available in macOS 10.14.5.
Note for AppleALC:
Requires the installation of 100 / 200 / 300 Series Audio Support on any of these motherboard series.
Visible Changes 11.1.0:
- Added Drivers -> Audio -> Optional 3 Port (Native) Audio
- Added Drivers -> Network -> Aquantia
- Added Drivers -> Network -> Aquantia -> Aquantia AQC107 Support
- Added Customize -> System Definitions -> iMac -> iMac 16,1
- Added Customize -> System Definitions -> iMac -> iMac Pro 1,1
- Added Customize -> System Definitions -> Mac mini -> Mac mini 7,1
- Added Customize -> System Definitions -> Mac mini -> Mac mini 8,1
- Removed Customize -> System Definitions ->MacBook Pro
- Removed Customize -> System Definitions ->MacBook Air
Internal Changes:
- Updated Clover to v2.4k r4911
- Updated Drivers Audio AppleALC to Lilu v1.3.5 and AppleALC v1.3.6
- Updated Drivers -> Disk -> Intel Generic AHCI SATA to v0.5
- Updated Drivers -> USB -> Remove XHCI USB Port Limit for macOS 10.14.4
- Updated Customize -> Graphics Configuration -> Core Graphics Fixup AKA WhateverGreen to Lilu v1.3.5 and WhateverGreen v1.2.7
- Updated all Customize -> System Definitions with latest BIOS versions.
- Updated serial number generator.
Note for AppleALC:
Requires the installation of 100 / 200 / 300 Series Audio Support on any of these motherboard series.
Internal Changes 11.0.1:
- Fixed serial number generator for iMac18,2 and iMac18,3
Known UI Issue:
Expanding an outline choice sometimes takes two clicks to expand. This seems to be related to changes Apple made in Mojave. We hope to fix this in a future update to MultiBeast 11.
Visible Changes 11.0.0:
- Added Drivers -> Audio -> 100 / 200 / 300 Series Audio Support (HDAS > HDEF)
- Added Drivers -> Audio -> X299 Series Audio Support (CAVS > HDEF)
- Added Drivers -> Audio -> Optional 3 Port (5.1) Audio
- Removed Drivers -> Audio -> Realtek ALCxxx
- Renamed Drivers -> Audio -> Universal to Drivers -> Audio -> VoodooHDA
- Replaced Drivers Audio Universal VoodooHDA v2.9.0d10 with VoodooHDA v2.9.1
- Moved Drivers -> Misc -> Core Graphics Fixup AKA WhateverGreen to Customize -> Graphics Configuration
- Removed Drivers -> Misc -> VoodooTSCSync -> 4 Core
- Removed Drivers -> Misc -> VoodooTSCSync -> 6 Core
- Removed Drivers -> Misc -> VoodooTSCSync -> 8 Core
- Replaced Drivers -> Misc -> VoodooTSCSync with RehabMan's Branch of VoodooTSCSync
- Added Customize -> System Definitions -> iMac -> iMac 18,1
- Renamed Customize -> Graphics Configuration -> Intel HD 630 to Intel HD 630 (Coffee Lake)
- Removed Customize -> System Definitions -> iMac -> iMac 11,1
- Removed Customize -> System Definitions -> iMac -> iMac 11,2
- Removed Customize -> System Definitions -> iMac -> iMac 11,3
- Removed Customize -> System Definitions -> iMac -> iMac 12,1
- Removed Customize -> System Definitions -> iMac -> iMac 12,2
- Removed Customize -> System Definitions -> MacBook Pro -> MacBook Pro 6,1
- Removed Customize -> System Definitions -> MacBook Pro -> MacBook Pro 6,2
- Removed Customize -> System Definitions -> MacBook Pro -> MacBook Pro 8,1
- Removed Customize -> System Definitions -> MacBook Pro -> MacBook Pro 8,2
- Removed Customize -> System Definitions -> MacBook Pro -> MacBook Pro 8,3
- Removed Customize -> System Definitions -> Mac mini -> Mac mini 5,1
Internal Changes:
- Updated Clover to v2.4k r4769
- Updated Drivers Audio AppleALC to Lilu v1.2.8 and AppleALC v1.3.3
- Updated Drivers Misc FakeSMC to RehabMan's Branch v6.26-357-gceb835ea.1800
- Updated Drivers Misc FakeSMC Plugins to RehabMan's Branch v6.26-357-gceb835ea.1800
- Updated Drivers Misc FakeSMC HWMonitor to RehabMan's Branch v6.26-357-gceb835ea.1800
- Updated Drivers USB 7/8/9 Series USB Support to FakePCIID v1.3.15
- Updated Drivers USB Remove XHCI USB Port Limit with Mojave 10.14.1 specific patch
- Updated Drivers USB USBInjectAll to USBInjectAll v0.7.1
- Updated Customize -> Graphics Configuration -> Core Graphics Fixup AKA WhateverGreen to Lilu v1.2.8 and WhateverGreen v1.2.4
- Update all Customize -> System Definitions with latest BIOS versions
Visible Changes 10.4:
- Added Drivers Audio AppleALC
- Added Drivers Misc Core Graphics Fixup AKA WhatEverGreen
- Removed Customize Graphics Configuration Intel HD 3000
- Removed Customize Graphics Configuration Intel HD 5xx
- Removed Customize Graphics Configuration AMD Graphics Fixup
- Removed Customize Graphics Configuration Intel Graphics Fixup
- Removed Customize Graphics Configuration Nvidia Graphics Fixup
Internal Changes:
- Updated Clover to v2.4k r4630
- Updated Clover UEFI Mode to use AptioMemoryFix.efi and added ApfsDriverLoader-64.efi
- Updated Drivers Audio Realtek ALCxxx ALCnnn with realtekALC 3.0
- Updated Drivers USB Remove XHCI USB Port Limit with 10.13.6 patch
- Updated Drivers USB USBInjectAll to v0.6.5
- Fixed Drivers Audio Realtek ALCxxx 200 / Z370 Series / X299 Audio Device ID Patch
- Fixed Drivers Audio Realtek ALCxxx H310 / B360 / H370 / Q370 Audio Device ID Patch
= New Choice Details:
- Drivers Audio AppleALC installs AppleALC v1.3.0 with LiLu v1.2.5
- Drivers Misc Core Graphics Fixup AKA WhatEverGreen installs WhatEverGreen v1.2.0 with LiLu v1.2.5
Notes When Using AppleALC:
Requires the installation of 100 / 200 / 300 Series Audio Support on any of these motherboard series.
Notes When Using Realtek ALCxxx:
Apple has changed the behavior for kextcache as of Sierra. When using any of the Realtek ALCxxx enablers you need to install them after you are booted from the destination disk to get audio to work properly.
When installing audio for 100 Series motherboards you need to install 100 / 200 / 300 Series Audio Support before installing a codec enabler.
When installing audio for 200 / 300 Series motherboards you need to install 100 / 200 / 300 Series Audio Support and 200 / Z370 Series / X299 Audio Device ID Patch or H310 / B360 / H370 / Q370 Audio Device ID Patch before installing a codec enabler.
Visible Changes 10.2:
- Renamed Drivers -> Audio -> Realtek ALCxxx -> 100 / 200 Series Audio to 100 / 200 / 300 Series Audio Support
- Added Drivers -> Audio -> Realtek ALCxxx -> 200 / 300 Series / X299 Audio Device ID Patch
Internal Changes:
- Updated Clover to v2.4k r4359
- Updated Clover defaults to include APCI > DSDT > Drop Tables > MATS
- Updated Clover defaults APCI > DSDT > Fixes to use the current fix names
- Updated FakeSMC installation to install to /Library/Extensions and /Volumes/EFI/EFI/CLOVER/kexts/Other/
- Updated Drivers -> USB -> Increase Max Port Limit with USBInjectAll v0.6.3
- Updated Drivers -> USB -> Increase Max Port Limit 200 Series with USBInjectAll v0.6.3
- Updated Customize -> Graphics Configuration -> Intel Graphics Fixup to v1.2.1 with Lilu v1.2.1
- Updated Customize -> Graphics Configuration -> Nvidia Graphics Fixup with Lilu v1.2.1
- Updated all Customize -> System Definitions to latest BiosVersions and removed unnecessary fields.
- Removed unmount of destination volume EFI partition when finished.
Visible Changes 10.1:
- Renamed Customize -> Graphics Configuration -> AMD Graphics Fixup AKA Whatevergreen to Customize -> Graphics Configuration -> AMD Graphics Fixup
- Added details for "Mounting EFI failed"
Internal Changes:
- Fixed EFI volume mounting and unmounting.
- Updated Clover to v2.4k r4297
- Fixed Drivers -> Network -> Realtek -> RealtekRTL81xx v2.2.1 package permissions
- Fixed Drivers -> Network -> Atheros -> AtherosE2200Ethernet v2.0.1 package permissions
- Fixed Drivers -> Network -> Atheros -> AtherosE2200Ethernet v2.1.0 package permissions
- Changed Customize -> Graphics Configuration -> AMD Graphics Fixup to use RadeonDeInit in Clover v2.4k r4297
Visible Changes 10.0:
- Removed Drivers -> Audio -> Realtek ALCxxx -> ALC269 (BRIX only)
- Removed Drivers -> Audio -> Realtek ALCxxx -> ALC283 (BRIX Pro and NUC only)
- Renamed Drivers -> Misc -> FakeSMC v6.25-333-g05e0f4be.1759 to Drivers -> Misc -> FakeSMC
- Renamed Drivers -> Misc -> FakeSMC Plugins v6.25-333-g05e0f4be.1759 to Drivers -> Misc -> FakeSMC Plugins
- Renamed Drivers -> Misc -> FakeSMC HWMonitor v6.25-333-g05e0f4be.1759 to Drivers -> Misc -> FakeSMC HWMonitor
- Renamed Drivers -> Misc -> NullCPUPowerManagement v1.0.0d2 to Drivers -> Misc -> NullCPUPowerManagement
- Replaced Drivers -> Network -> Atheros -> AtherosE2200Ethernet v2.2.1 with AtherosE2200Ethernet v2.2.2
- Removed Drivers -> Network -> Intel -> AppleIntelE1000e v3.3.1
- Replaced Drivers -> Network -> Intel -> AppleIntelE1000e v3.3.3 with AppleIntelE1000e v3.3.6
- Renamed Bootloaders -> Clover v2.4k r4063 UEFI Boot Mode to Clover UEFI Boot Mode
- Renamed Bootloaders -> Clover v2.4k r4063 UEFI Boot Mode + Emulated NVRAM to Clover UEFI Boot Mode + Emulated NVRAM
- Renamed Bootloaders -> Clover v2.4k r4063 Legacy Boot Mode to Clover Legacy Boot Mode
Internal Changes:
- Added support for choosing APFS volumes as destination.
- Updated Clover installers to install apfs.efi from destination volume.
- Updated Clover to v2.4k r4289
- Replaced Drivers -> Audio -> Universal -> VoodooHDA v2.9.0d10 with the correct installer
- Updated Drivers -> Misc -> FakeSMC to RehabMan's Branch v6.26-322-g1b20eab7.1765
- Updated Drivers -> Misc -> FakeSMC Plugins to RehabMan's Branch v6.26-322-g1b20eab7.1765
- Updated Drivers -> Misc -> FakeSMC HWMonitor to RehabMan's Branch v6.26-322-g1b20eab7.1765
- Updated Drivers -> USB -> Increase Max Port Limit 9 Series for High Sierra 10.13
- Updated Drivers -> USB -> Increase Max Port Limit 100 Series for High Sierra 10.13
- Updated Drivers -> USB -> Increase Max Port Limit 200 Series for High Sierra 10.13
- Updated Customize -> Graphics Configuration -> HD 6xx to include -disablegfxfirmware boot flag
- Updated Customize -> Graphics Configuration -> AMD Graphics Fixup AKA WhateverGreen to v1.1.2
- Updated Customize -> Graphics Configuration -> Intel Graphics Fixup to v1.2.0
- Updated Customize -> Graphics Configuration -> Nvidia Graphics Fixup to v1.2.1
Visible Changes 9.2:
- Added Drivers -> Audio -> Universal -> VoodooHDA v2.8.9
- Added Drivers -> Audio -> Universal -> VoodooHDA v2.9.0d10
- Replaced Drivers -> Network -> Atheros -> AtherosE2200Ethernet v2.2.0 with AtherosE2200Ethernet v2.2.1
- Replaced Drivers -> Network -> Intel -> IntelMausiEthernet v2.2.1d1 with IntelMausiEthernet v2.3.0
- Added Customize -> Graphics Configuration -> AMD Graphics Fixup AKA WhateverGreen
- Added Customize -> Graphics Configuration -> Intel Graphics Fixup
- Added Customize -> Graphics Configuration -> Nvidia Graphics Fixup
- Added Customize -> System Definitions -> iMac -> iMac18,2
- Added Customize -> System Definitions -> iMac -> iMac18,3
Internal Changes:
- Updated Clover to v2.4k r4173
- Corrected Permissions on Drivers -> Disk -> 3rd Party SATA
- Updated Drivers -> Disk -> Intel Generic AHCI SATA to v0.4
- Updated Drivers -> Misc -> FakeSMC to RehabMan's Branch v6.25-333-g05e0f4be.1759
- Updated Drivers -> Misc -> FakeSMC Plugins to RehabMan's Branch v6.25-333-g05e0f4be.1759
- Updated Drivers -> Misc -> FakeSMC HWMonitor to RehabMan's Branch v6.25-333-g05e0f4be.1759
- Updated Drivers -> USB -> 7/8/9 Series USB Support to FakePCIID v1.3.9
- Updated Drivers -> USB -> Increase Max Port Limit 9 Series with USBInjectAll v0.6.2
- Updated Drivers -> USB -> Increase Max Port Limit 100 Series with USBInjectAll v0.6.2
- Updated Drivers -> USB -> Increase Max Port Limit 200 Series with USBInjectAll v0.6.2
- Updated Customize -> Graphics Configuration -> HD5xx
- Updated Customize -> Graphics Configuration -> HD6xx
Visible Changes 9.1:
- Added Drivers -> Audio -> Realtek ALCxxx -> ALC1220
- Added Drivers -> Audio -> Realtek ALCxxx -> ALC1220A (ASUS ROG STRIX Only)
- Renamed Drivers -> Audio -> Realtek ALCxxx -> Optional HD3000/HD4000/HD530 HDMI Audio to Optional HD3000/HD4000 HDMI Audio
- Removed Drivers -> Audio -> Realtek ALCxxx -> Optional HD 4600 HDMI Audio
- Renamed Drivers -> Audio -> Realtek ALCxxx -> 100 Series Audio to 100 / 200 Series Audio
- Added Drivers -> Network -> Intel -> IntelMausiEthernet v2.2.1d1
- Renamed Drivers -> USB -> Increase Max Port Limit to Increase Max Port Limit 100 Series
- Added Drivers -> USB -> Increase Max Port Limit 9 Series
- Added Drivers -> USB -> Increase Max Port Limit 200 Series
- Added Bootloaders -> Clover v2.4k r4063 UEFI Boot Mode + Emulated NVRAM
- Renamed Customize -> Graphics Configuration -> HD530 to HD 5xx
- Added Customize -> Graphics Configuration -> HD6xx
- Added Customize -> Graphics Configuration -> NVIDIA Web Drivers Boot Flag
Internal Changes:
- Updated Clover to v2.4k r4063
- Updated Drivers -> Disk -> 3rd Party SATA to v0.6
- Updated Drivers -> Disk -> Intel Generic AHCI SATA to v0.3
- Updated Drivers -> Misc -> FakeSMC to RehabMan's Branch v6.25-332-gf3a8525c.1758
- Updated Drivers -> Misc -> FakeSMC Plugins to RehabMan's Branch v6.25-332-gf3a8525c.1758 *
- Updated Drivers -> Misc -> FakeSMC HWMonitor to RehabMan's Branch v6.25-332-gf3a8525c.1758
- Updated Drivers -> USB -> 7/8/9 Series USB Support to FakePCIID v1.3.6
- Updated Drivers -> USB -> Increase Max Port Limit 100 Series with USBInjectAll v0.5.17
- Updated Customize -> Graphics Configuration -> HD 5xx with glitch fix
- Fixed Drivers -> Audio -> Realtek ALCxxx -> ALC885/889a to remove erroneous installation of patch
UniBeast for Mac
Easy to use utility for creating a bootable USB drive that can also act as a recovery disk with the help of a copy of macOS downloaded the Mac App StoreCreating a bootable USB disk with a copy of macOS can come in very handy if you need to clean install the operating system on your Mac, if you want to upgrade it easier or if you require a rescue disk for getting back your data from a crashed hard drive.
Even though you can do this with the tools built-in within macOS, by combining the power of Apple’s Disk Utility and the Terminal, the process may be too complicated for some newer macOS users or just plain difficult if you’ve never used the Terminal before.
Create bootable USB drives from any macOS installer downloaded from the Mac App Store
This is where UniBeast comes in, as a very simple to use tool for rapidly and quickly creating a bootable USB drive using the macOS copy you bought from the Mac App Store or downloaded for free if your Mac is running Mavericks or Yosemite. There’s only one requirement before beginning the process of transforming your USB disk into a bootable macOS installation drive: you will first have to format it as a Mac OS Extended (Journaled) disk with 1 partition, as explained on the developer’s website.
Straightforward selection process for the macOS version and destination volume The next thing is to launch the UniBeast.app, choose the destination USB disk and the macOS version to use for creating your bootable USB drive.
After going through all the screens of the UniBeast installer you only have to click the Install button, enter your password and wait for the drive to be created.
Quick and efficient way of making your own macOS recovery and installation drive
After the process has completed, you can use the bootable USB macOS drive you’ve created to perform a clean installation of macOS on your Mac or use it as an upgrade disk for any Mac that run a lower version of macOS. UniBeast provides you with a streamlined way of creating bootable USB disk out of the macOS installer you’ve downloaded from the Mac App Store, without the need of using the Terminal app.
UniBeast 9.2.0
April 18th, 2019Updated Clover UEFI to v2.4k r4920
Updated Clover Legacy to v2.4k r4920
Fixed Legacy Boot Mode copying apfs.efi to destination drive.
New in UniBeast 9.1.0
Renamed various User Interface elements and text.
Updated UniBeast.log messages.
Updated Clover UEFI to v2.4k r4862
Updated Clover Legacy to v2.4k r4862
Removed script No-Convert to disable automatic conversion of installation volume to APFS as it is no longer valid.
Conclusion
To conclude MultiBeast for Mac works on Mac operating system and can be easily downloaded using the below download link according to Freeware license. The download file is only 35.6 MB in size.MultiBeast for Mac was filed under the System category and was reviewed in softlookup.com and receive 5/5 Score.
MultiBeast for Mac has been tested by our team against viruses, spyware, adware, trojan, backdoors and was found to be 100% clean. We will recheck MultiBeast for Mac when updated to assure that it remains clean.
MultiBeast for Mac user Review
Please review MultiBeast for Mac application and submit your comments below. We will collect all comments in an effort to determine whether the MultiBeast for Mac software is reliable, perform as expected and deliver the promised features and functionalities.Popularity 10/10 - Downloads - 15070 - Score - 5/5
| Category: | System |
| Publisher: | Tonymacx86 |
| Last Updated: | 11/10/2023 |
| Requirements: | macOS 10.14.1 or later (Intel only) |
| License: | Freeware |
| Operating system: | Mac |
| Hits: | 25570 |
| File size: | 35.6 MB |
| Price: | Not specified |
| Name: * |
E-Mail: * |
| Comment: * |
|